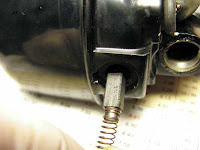
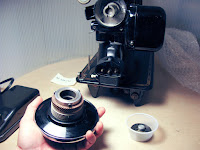
If you are arriving at this entry for the first time, this is a comprehensive guide on how to re-wire the potted motors found on vintage Singer 15-91 and 201-2 sewing machines. It is my attempt to walk someone with zero experience through the entire process.
For your convenience, here are links to all 20 entries in the series. This way you can bookmark this page as a Table of Contents and quickly get to the entry you need.
1: Wire, Wire Stripping and Wire Braiding
Learn about the tools and wiring basics you’ll need to know to re-wire a motor.

2: Tools & Materials Required for Soldering
Learn what equipment you'll need to complete basic wire soldering.
3: Learning to Solder
Learn and practice basic wire soldering.
4: How to Terminate Your Wires
Learn how to create connections for attaching wiring to power terminals.
5: Covering Wire Joints with Heat Shrink Tubing
Learn how to clean up exposed wiring.
6: The Underwriter's Knot
Learn how to tie wiring into a strain-relieving knot.
Part B: Motor Disassembly
7: Disconnecting the Motor Leads
Learn to detach your sewing machine’s power terminal and wiring.
8: Motor Housing Removal
Learn to take the motor off of your machine.
9: Grease Wick Removal
Learn how to remove those grease wicks and where to get replacements.
10: Motor Brush Removal
Learn how to take those motor brushes out and look for signs of motor trouble.
11: Armature & Worm Removal
Learn to remove two crucial parts of your motor.
12: Detaching the Field Core
Learn how to safely crack the motor open.
Part C: Making Repairs
13: Cutting and Prepping the Motor Leads
Learn where to cut the bad wiring off.
14: Replacing the Motor Housing Grommet
Learn how to remove a cracked rubber grommet, where to get a new one, and how to put it in.
15: Soldering On New Motor Leads
Learn where and how to solder on the new wiring.
17 (Yes, this is out of sequence): Cleaning the Commutator
Learn how to clean off a crucial element of your motor.
Part D: Motor Re-assembly
16: Re-attaching the Field Core
Here we start putting the motor back together.
18 (Yes, this is out of sequence): Re-installing the Armature and Worm
Learn the tricks behind putting these two crucial parts of your motor back together.
19: Re-installing the Brushes and Grease Wicks
Learn to easily re-install these correctly.
20: Hooking It All Back Up
Here in the final step we finish up the wiring, run the motor in, and put it all back together.
[A caveat: I hope you'll be able to bring your potted motor back to life with new, safe wiring, as shown here. But please be aware that these steps are not an absolute guarantee of success, as a small percentage of motors may be completely burned out, which is currently beyond my capabilities.]


Thank you for taking the time to do this! Happy New Year!
ReplyDeleteGreat work, Rain. Thanks so very much!
ReplyDeleteRain: I love you.
ReplyDeleteThis is FABULOUS. High on my list of things to learn, but I thought I was going to have to find an OSMG to teach me.
ps: I am not an evil stalker, please don't worry. I once told Bill Holman that I loved him, too, but I think I freaked him out! I'm just SO appreciative of people who share their awesome knowledge.
Someone sent me a link to your blog and I LOVE it. I hope you keep up the great work. My hobbyless husband has just decided that he might like to tinker with old Singers. Your blog will be a GREAT help. Will you share some information on finding accessories for the machine?..Value of machines...identifying the "feet"? There is SO much we'd love to know more about.
ReplyDeleteThanks for taking the time to write this up. It will come in very handy when I re-do my 15-91.
ReplyDeleteRain, your photographs are beautiful.
ReplyDeleteI love this blog! Thanks for posting!
This series is just wonderful! SO, so helpful! You wouldn't happen to have one for re-wiring the light on a 15-91, would you?
ReplyDeleteThanks again!
I've found rewiring the light on a 15-91 is a *serious* pain in the neck. It's not the actual rewiring that's difficult, it's removing and re-installing the smallest of the three compression rings that hold the light fixture together. I won't write this one up until I find a satisfactory tool for re-installing the compression ring. I need to do more research.
DeleteThank you ever so much for your tutorial. Most of my vintage sewing machines have wiring issues. Looks like I have to add a few more tools to my tool kit. Do you have any experience with what I think are Chicago electrical connections? They are the round male and female connections.
ReplyDeleteHi Caroline, I learned the absolute bare amount necessary to rewire my machines, so I'm afraid I haven't even heard of Chicago electrical connections. If you learn something about them and find they are good for sewing machines, please let us know!
Deletethanks,
- Rain
Hi Rain,
ReplyDeleteI am new to your blog and have to thank you profusely because this is *exactly* what I've been looking for :)
Your step-by-step instructions, photos, and videos are wonderful and like a suspenseful read, kept me up half the night :)
I look forward to reading your blog from it's beginning.
Best,
Jae
Wow. This is a fantastic resource. Huge thank you for posting this.
ReplyDeleteI understand that some motors can also become generators. Do you know if the old Singer sewing machine motors could do this? The ones I have are mostly 1920s to 1940s
your blog and MPB inspired me to find a 15-91. The one I found looked like it had hardly been used, but I was determined to start with a clean, safe machine. Thanks to you did the whole thing myself and feel such a sense of accomplishment. I did find that Singer oil didnt get the mechanical parts to work smoothly--probably hadnt been used in years. On the advice of Duane at Singer Parts Website, gave it a few sprays of WD40 and that worked like magic. Great Machine! Thanks again for taking the time to help and showing me an alternative to fancy plastic.
ReplyDeletePlease don't ever use WD-40 on a sewing machine! It seems to work wonders at first, but later on it dries into a gummy-like consistency that will cause problems. Anytime WD-40 is used on a part, it must be flushed out afterwards with oil, which is why I don't use it (extra work and mess).
DeleteI want to add a big THANK YOU for taking time to publish this tutorial. While I'm not quite ready to open up the motors on my 15-91 and 201, I have bookmarked this for future reference. Great blog :)
ReplyDeleteThis is AWESOME! I have 3 machines to fix!
ReplyDeleteThank you for doing exactly what I always thought I would do, but never have gotten around to! LOL! I do rescue old sewing machines, and with the help of my hubby (particularly stuck parts, or electrical stuff), we have saved many of these wonderful old machines that will probably never be manufactured & sold in the U.S.A. again. Hopefully, there are plenty of we "hoarders" around to rescue, maintain & repair as many as possible for the day when Americans can no longer afford to buy clothing made cheaply in third world countries, and when they have to learn to sew again themselves! Your photos & instructions are fabulous, thank you so very much for taking the time to create & maintain this blog! We really appreciate you sharing your experience & learning with us.
ReplyDeleteSincerely,
Becky
Thank you so much for writing this. I stumbled apon a 15-91 cabinet (the art deco one) a few years ago at a garage sale. It needs to be rewired and there are no decent repair shops within hours of my house.
ReplyDeleteThanks to your blog my hubby and I got my 1946 15-91 up and going again. Faster than it has ever run. Now if I can get the tension figured out I will be up and sewing. Then I will re-do my 1948 15-91.
ReplyDeleteThank you for your time and effort in putting this together. It is very well done..kudos. One question...i rewired the motor on my 15-91......unloaded it sounds like your video, however when connected to the machine it has almost no power. the machine ran faster before i redid the motor. What do you think it may be?
ReplyDeleteIt's mechanically impossible that your machine ran faster before you redid the motor, particularly when the redone motor runs well without a load. Think about the chain of things that the motor drives; if your machine somehow now runs slower, that means you have done something, between then and now, to slow one of the components down. If I had your machine in front of me, I might be able to figure out what that was; since I don't, you'll have to go over the mechanical components that the motor is driving, and figure out which one has gotten "sticky."
DeleteRain, just wanted to let you know that because of your wonderful tutorial series, the 201 I brought home with the melted wires, now runs. Who knew I could actually do this?! Thank you so much for all the thought and time you put into this. Now just to wire a foot pedal, she didn't come with one...
ReplyDeleteThanks again. Off to do a happy dance. Hooray!
Hi
ReplyDeletethank you for your hard work in showing us how to rewire the machine. I just wonder whether you know how to fix singer 328k. The motor just stop working. I wonder if you know what is wrong. Do i have to change d whole motor?Thank you once again
I am terribly concerned that I finished the process and have three screws left over!
ReplyDelete